Natural Stone Flooring with Underfloor Heating: What You Need to Know
Natural stone and underfloor heating work well together, provided you follow a few crucial rules. Drying times, movement joints, stone thickness and heat-up speed matter.
DecoStone Natuursteen
Natural stone specialist · Amsterdam
Table of contents
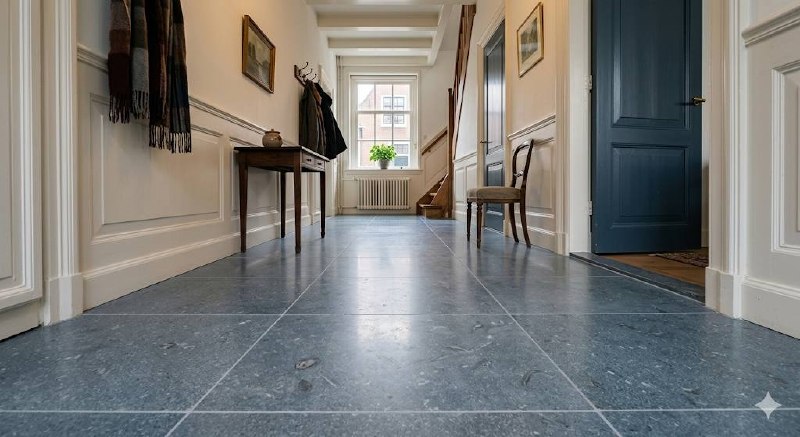
Stone and heat: a combination that works — if you know the rules
Natural stone and underfloor heating can be an excellent technical combination. Stone is one of the best materials for underfloor heating: it has high thermal conductivity and heat storage, which means heat rises efficiently and is retained for a long time.
But there are conditions. In practice, they are regularly ignored, resulting in cracked stone, loose tiles or raised floor slabs. This article explains exactly what you need to know.
Why can stone cause problems with underfloor heating?
The problem is not heat itself, but thermal expansion and contraction. Every material expands slightly when heated and contracts when cooled. Stone does this less than wood, but not zero.
In a floor 10 metres long, thermal expansion can amount to 1–2 mm. Harmless in itself, but if that expansion has no space — because there are no movement joints, or because the stone has been bonded too rigidly — stress builds in the floor until something gives.
What gives is either the stone itself (crack or chip) or the adhesive layer between stone and screed (tile loosening).
Rules for natural stone on a heated floor
Rule 1: Correct drying time for the screed
This is the most important and most often ignored rule.
A concrete screed or anhydrite screed (calcium sulphate screed) must be fully dry before stone is laid on it. For a standard concrete screed, this takes at least 28 days at room temperature. An anhydrite screed dries faster but still needs 3–4 weeks.
The trap with underfloor heating is wanting to use it to speed up drying. That can be done — but only with a strict protocol:
Heat-up protocol for a new screed: Days 1–3: heat to a maximum of 25°C. Days 4–7: increase to 35°C (maximum temperature). Then hold at maximum temperature for 7 days. Cool down gradually afterwards; do not switch the heating off suddenly.
You should receive this protocol in writing from the contractor or have it carried out and recorded on site. Wait at least another 24–48 hours before starting installation.
Why so strict? A screed that is too wet causes a weak bond, moisture transport through the stone (white bloom) and shrinkage of the screed that pulls the stone with it.
Rule 2: Movement joints — more than you think
With underfloor heating, movement joints are mandatory, not optional.
Along all edges (wall-floor junction): at least 5 mm. Every 4–5 metres in large floor areas: movement joint of at least 5 mm. At transitions (threshold, another room): always a joint. Around columns and obstacles: always a flexible joint.
Movement joints are finished with elastic silicone sealant, not rigid grout. Sealant can move; grout cannot.
Many people find movement joints “ugly”. A good tiler integrates them aesthetically. Without them, the chance of cracks or loose tiles within 2–5 years is significant.
Rule 3: Suitable adhesive and screed combination
Not every tile adhesive is suitable for underfloor heating. You need a flexible tile adhesive (class C2S2 according to EN 12004), also called flexible or deformable adhesive.
Standard cement adhesive (class C1) is too rigid. With thermal movement, it releases.
For large stone slabs (60×60 cm and larger), use adhesive with a notched trowel and cover at least 85–90% of the tile surface (full bedding, no air pockets).
Rule 4: Stone thickness and thermal resistance
Thicker stone means higher thermal resistance, so the underfloor heating must work harder for the same result.
Guideline: up to 10 mm thickness gives excellent heat transfer. 12–15 mm is good and standard for most projects. At 20 mm and thicker, thermal resistance increases; consult the installer to check whether the heating system can handle it.
For underfloor heating, polished or coarse finishes are not a problem. However, a completely flat underside of the stone is essential for good adhesion and heat transfer. Rough or processed backs require more adhesive.
Rule 5: Heat-up speed in use
After laying and grouting, do not activate the underfloor heating at full power immediately.
Start-up protocol after installation: Week 1: maximum 20°C flow temperature. Week 2: maximum 30°C. Week 3 onwards: normal use.
Abrupt heating creates thermal shock in the system. Stone that has just been laid and is not fully settled is sensitive to sudden temperature changes.
Which stone type is most suitable for underfloor heating?
All natural stone types can, in principle, be used. Some perform better.
Excellent: Granite is hard, stable and has good thermal conductivity with low thermal expansion. Belgian bluestone is compact, stable and traditionally used. Slate has good thermal conductivity and is available in thin formats.
Good: Marble performs well when installed correctly with movement joints. With limestone, pay attention to porosity if the screed is moist.
Needs more attention: Travertine has open pores that should be filled before installation; moisture transport must be managed well. Sandstone has higher porosity; monitor moisture transport.
Underfloor heating and an existing stone floor
Do you already have a stone floor and want to add underfloor heating? The options depend on what is there.
Installing electric underfloor heating mats under an existing floor is almost never possible without demolition. Infrared film directly under stone is not technically recommended. The best approach: if you are renovating anyway, remove the floor and rebuild the system properly.
For projects like this, DecoStone always advises getting involved early — before the first tile is laid.
Summary checklist
- Screed fully dry (moisture content measured with a moisture meter)
- Heat-up protocol completed for new screed
- Flexible tile adhesive (C2S2) selected
- Movement joints planned along all edges
- Movement joints within the field for areas longer than 5 m
- Finished with elastic silicone sealant (no rigid grout)
- Start-up protocol followed after installation
- Impregnation after joints have fully cured
Need help? Contact DecoStone →
See also: Maintaining a bluestone floor: the complete guide
Need help?
Unsure about the right approach, or want to know what is possible? Send us a photo via WhatsApp and we will give you honest advice — without obligation.
Want to be sure which treatment is safe?
Send photos of the surface, room and problem. DecoStone assesses the material, damage pattern and risks before advising on a treatment or quotation.
Related articles
Importing Natural Stone? Check Quality Control Before Handover
Importing natural stone yourself, or having it supplied through several parties, can work well, but it requires proper quality control. Especially with quartzite such as Taj Mahal, repair costs after installation can rise sharply.
Preparing for the Workday: How to Be Ready for DecoStone
DecoStone will soon visit for maintenance, repair, polishing or impregnation of natural stone. With this preparation, the workday can run calmly, neatly and efficiently.
Ceramic vs. Real Natural Stone: An Honest Comparison
Ceramic tiles imitate stone better and better. But there are essential differences that only become visible after years — or sooner than expected. What should you consider?